
Welcome to our family camper van build adventure! We’re transforming our Ford Transit Custom into our very own camper van, tackling every step together as a family. With our two young lads getting stuck in alongside us, this project is as much about bonding and learning as it is about creating something amazing together, for us all to enjoy. Join us on this exciting journey as we share every triumph, challenge, and tip along the way – don’t forget to subscribe and follow our story as it unfolds! 🙂
Saturday 8th March 2025.
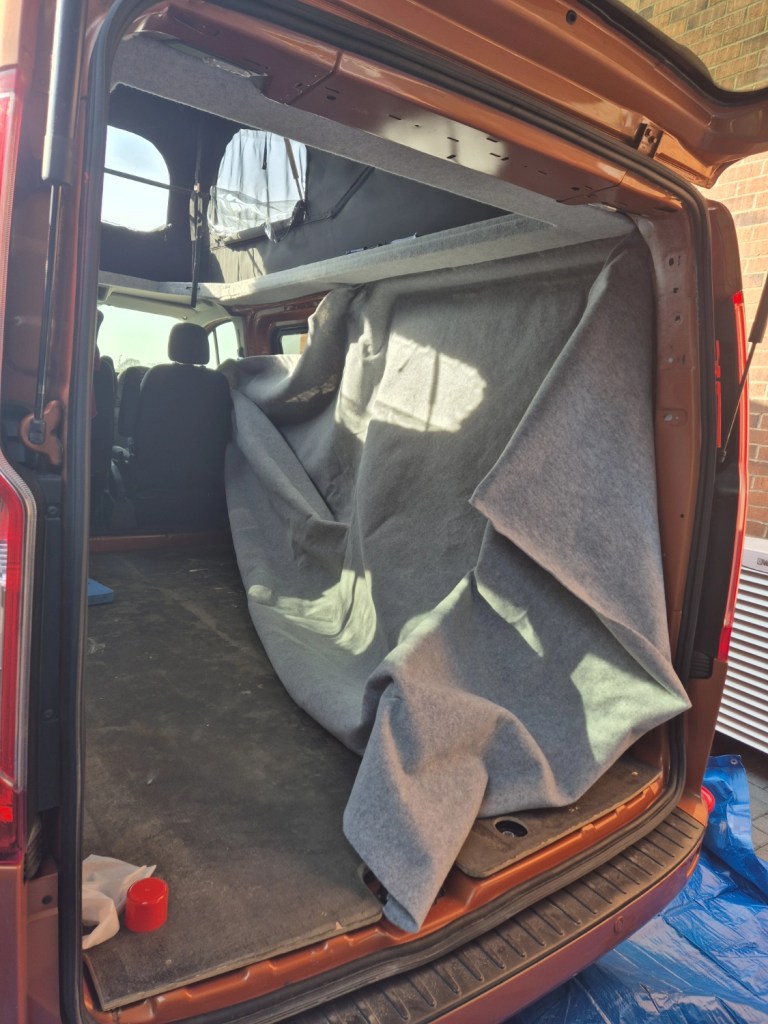
We woke up to a glorious day this morning. It was bright, but even more of a treat, it was warm as well! It was another opportunity to get out and do some work on the van, so we hopped outside after breakfast, opened the pop top, opened the windows, and grabbed the roll of carpet!
If I’m honest, I didn’t really know where to begin: I knew this was going to be a mammoth task! We decided to start on the drivers side wall. The reason being simple – if I fluffed it all up and made a mess of it, at least it would be hidden behind the kitchen unit 🤣
At first the carpet wouldn’t stick to the side of the van, and we were freaking out a little bit – then I took a good look at the carpet and, upon close inspection, realised that one side was a little fuzzier than the other! So if you’re planning to carpet your own van, take a good look – there was no information on the carpet and the one video I’d watched on YouTube hadn’t mentioned it either. In a previous life I’ve done boot builds, and that acoustic carpet was very much the same on each side 🙈
Faux pas aside, we turned the carpet around and tried again – yay, it sticks! We started at the top at the back, and planned to work our way down, then do the same on the front section, around the window. My husband helped me get the top stuck down and secure, then had to leave to try and do some work on his own car. This worked well as, like I said in the sound deadening post, finicky jobs aren’t for him, so I was able to rattle on at my own pace.
Initially I was struggling with the stretch in the carpet. I was wondering why I’d paid more for this fancy 4-way stretch carpet which didn’t seem to have any give! As I got further down the first section though, I became more acquainted with the carpet and realised I could tug it pretty firmly – the carpet had loads of give: you just needed to show it who’s boss! The glue was actually pretty strong too, and I found it best to wait 20 or so seconds before applying to allow it to get really tacky. I was worried about stretching the carpet too much incase either it ripped or the glue came away from an area I’d previously stuck. Fortunately, neither of these worries came into fruition, and after a wobbly, and slightly wrinkly start, I finished the first half and around the wheel arch like a pro! Whoop!
I’ll be covering the sides with the original ply panels (I’ll carpet them last) but I decided to carpet the entire side anyway, to help with insulation and noise. I can always cut away to access the open areas if I ever need to get to a module in the future. I really hope I don’t have to though 😅
After successfully completing the back half, I continued onward to the front section, and around the window. I’d gotten into a good rhythm with the carpet and glueing. I was learning to think ahead with which bits I was doing, as sometimes the way the carpet adhered meant it was difficult to reach into some nooks and crannies further along.
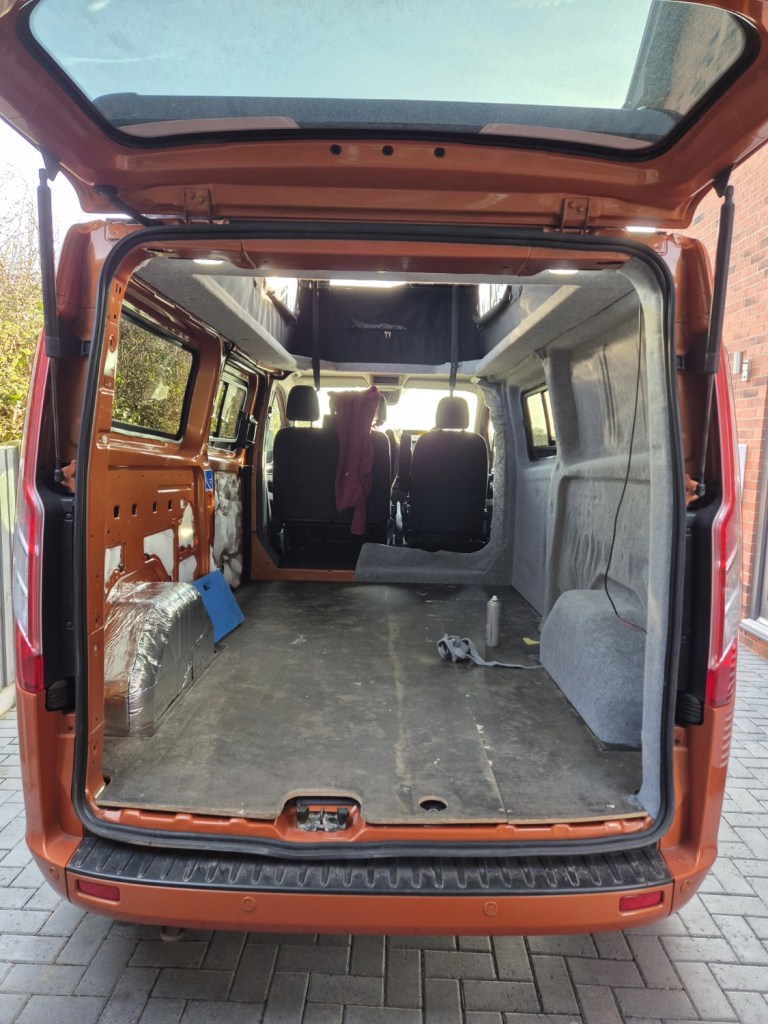
Eventually the side was done. I tucked the top overhang of carpet behind the bed frame that Evolution Vans had put in, and the I trimmed the bottom of the carpet with around 2″ of carpet to spare. This got tucked underneath the ply flooring, which we will secure once all the carpet is in place. I also trimmed the carpet around the tailgate to the edge of the panel, so it would fit nicely under the rear rubber trim – my husband was happy to help with this, battering the trim back in place with a rubber mallet – he’s found his calling!😁
The final part, which I’m sure took longer than everything else I’d done so far today, was to trim around the window very carefully, leaving around 5mm of carpet, and tucking this excess under the very tight window seals! Honestly, it took forever! I think altogether I was out in the van for 5 or 6 hours today, minus a couple of coffee breaks (thank you hubby!)
Sunday 9th March 2025
The next day I had already decided to hit the other side of the van, and I was up bright and early to get this done. However, our neighbours were also up bright and early – and asked us if we fancied a walk! We couldn’t resist, so we set off for a local 5.5 miler in some lovely spring weather.
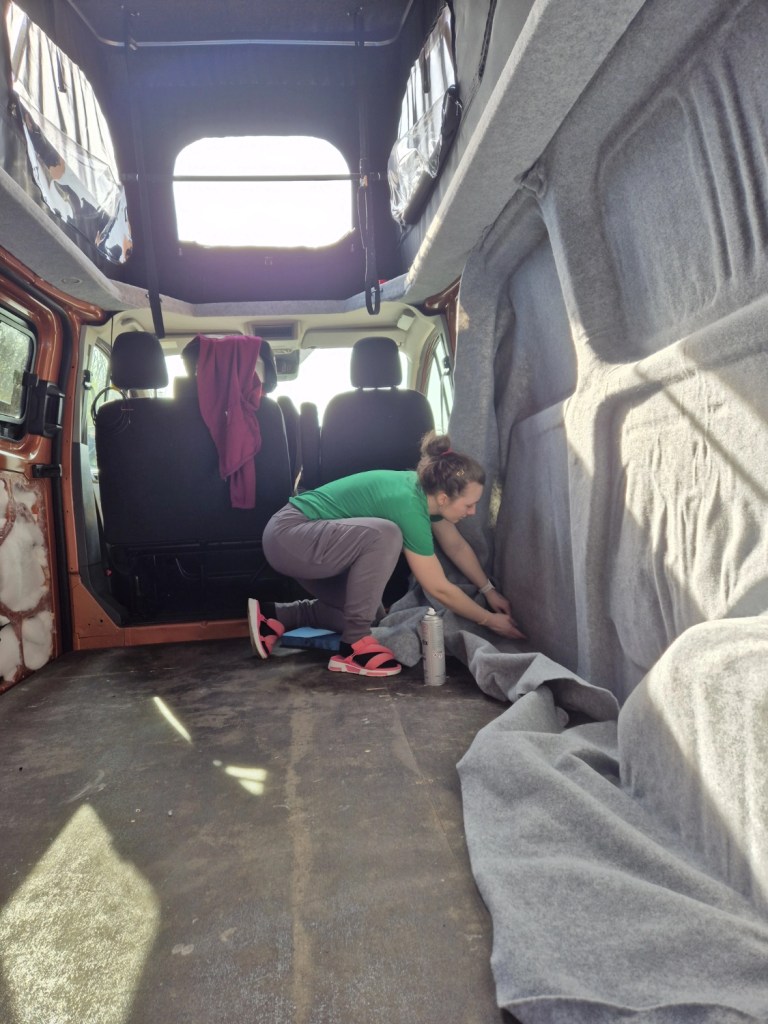
It was almost lunch time before we got back, and I now only had a short window to get the second side done, as my eldest had a football match at 1:30pm – no pressure! My husband made the boys some lunch whilst I started the glueing on the second side. I was amazed that I was able to get it all started by myself this time, so if you’re embarking on a van build by yourself this proves you can do it without an additional pair of hands. I was only able to make it halfway down the rear section of the side before we had to go out again, but I was definitely making a better job of fitting it this time, although frustratingly I managed to get glue on my hands twice and accidently smudged it on the ‘good’ side as I pushed the carpet into the crevices – ugh so frustrating! The only saving grace is that one area should be covered by the van shades when we finally order them 😅
After the football match (my lad’s team won, and my lad got ‘Man of the Match’!), I tackled the bottom half around the wheel arch and continued forward around the sliding door. Unfortunately the carpet was heavy so I decided to trim it, and somehow as I cut, it twisted and I cut it slightly too short for the b-post section 😩. Thankfully the carpet is really good quality and I was just able to stretch it enough to cover the b-post, what a relief 😅.
I was tired by this point so I called it day. During the week I popped out when I could to cut out and trim around the rear window. I still need to pull off the sliding door aperture trim and tuck in the edge of the carpet there, and also glue the carpet to the ply boards that we are keeping. That’s a job I’m going to get the boys to help with, as we can do it somewhere with better air flow and where they’re less likely to get covered in glue 😂. They did however absolutely love peeling off the glue from the windows where Mum had been a little over zealous with the spray glue application 🙈.
Carpeting the boards will be a separate post as I can’t believe how much I’ve written here! Key takeaways here are make sure you buy a good carpet – don’t underestimate how much good stretch will help you as you work around windows, grooves and those wheel arches! I used Mega Van Mats silver 4-way stretch carpet, and I had 2 people, who have also converted vans, independantly say how much thicker it was than whatever they had used. If it helps, I purchased the 12m kit, which was more than enough for a LWB Transit Custom with a pop-top – and came with plenty of spray glue too! You may need the 15m kit if you’re carpeting the roof.
I’m also very proud to have done the whole panel in one piece of carpet, especially as a first timer! If you’re tackling the carpeting, don’t be shy with the spray glue, make sure you protect your lungs, take your time and whilst I can confidently say it’s a job you can do by yourself, don’t underestimate how much more fun it would be with a helpful friend! I didn’t get extra hands but on a long job it was nice to get coffees delivered from the husband and happy chatter from the boys 😊
Next step – the altro floor!
Read our progress so far!
03. Part 01: Stripping the Interior
04. Part 02: Installing the Windows
05. Part 03: Installing the Pop Top (1)
06. Part 03: Installing the Pop Top (2)
07. Part 03: Installing the Pop Top (3)
10. Part 06: Floor Removal, Sound Deadening & Insulation
Discover more from Treks, Trails & Travel
Subscribe to get the latest posts sent to your email.

So impressed you tackling all this work yourself, although I’m guessing from some of your comments that you’ve done car related work before. I dread to think what a shambolic mess I would have made of things. Onwards!
LikeLiked by 1 person
Aww thank you so much ☺️ Yes I was bought up around cars and continued to tinker and modify once I had my own. I’m not afraid to try my hand at anything, though it isn’t all sunshine and rainbows, and I have as many stories of cock-ups as I do of triumphs 😅 but it’s all fun and very satisfying when things do go right and has been a super useful skill to save us money (and heartache!) being able to do the work ourselves. The nice thing is we all feel quite attached to the van now we’ve all had a hand in it’s conversion 🥰
LikeLike
Best of luck with the next big steps to get the beds ready then hopefully you’ll be close to setting off on the first overnights. Your boys must be well excited about that!
LikeLiked by 1 person
They are so excited, and I can’t wait either, adventures await!!
LikeLiked by 1 person