
Welcome to our family camper van build adventure! We’re transforming our Ford Transit Custom into our very own camper van, tackling every step together as a family. With our two young lads getting stuck in alongside us, this project is as much about bonding and learning as it is about creating something amazing together, for us all to enjoy. Join us on this exciting journey as we share every triumph, challenge, and tip along the way – don’t forget to subscribe and follow our story as it unfolds! 🙂
Saturday 16th March 2025.
Wow, I can’t believe we’re finally at the point of tackling the floor! The first task we had to do was screw the original ply back in place. My husband had been and bought some decent quality hex screws to do this. We’d placed the floor back in after we’d laid the sound deadening and insulation, but we hadn’t screwed it down as we’d wanted to be able to move each section to tuck in the excess carpet. It was really exciting to now be able to screw it down – it felt final!
The next step was to layout the flooring. I had cheated in a way, and ordered a precut floor from Combe Valley Campers. After removing the altro flooring that came with the van, I was able to feel how thick and difficult it was to work with. It’s not malleable at all, and I just knew trying to cut out my own shape would be hard work! If you do buy a ‘rectangle’, advice I’ve read includes laying your ply over it and using that as a template. My ply is great but it was a little off around the arches, which would’ve left a gap of visible floor (OK for the most part as you’d barely see it behind the kitchen) but it would’ve been very visible by the seats!

The problem, as I’d already anticipated, was that the floor is cut for a ‘naked’ van – ie, one that hasn’t been padded up with several mm’s of sound deadening, insulation and carpet, so once installed into the van, it was clear that a LOT of trimming was going to have to take place. Although it took me a couple of hours and was incredibly time consuming, I’m still pleased I took this route rather than buying a single rectangle sheet and cutting to my ply.
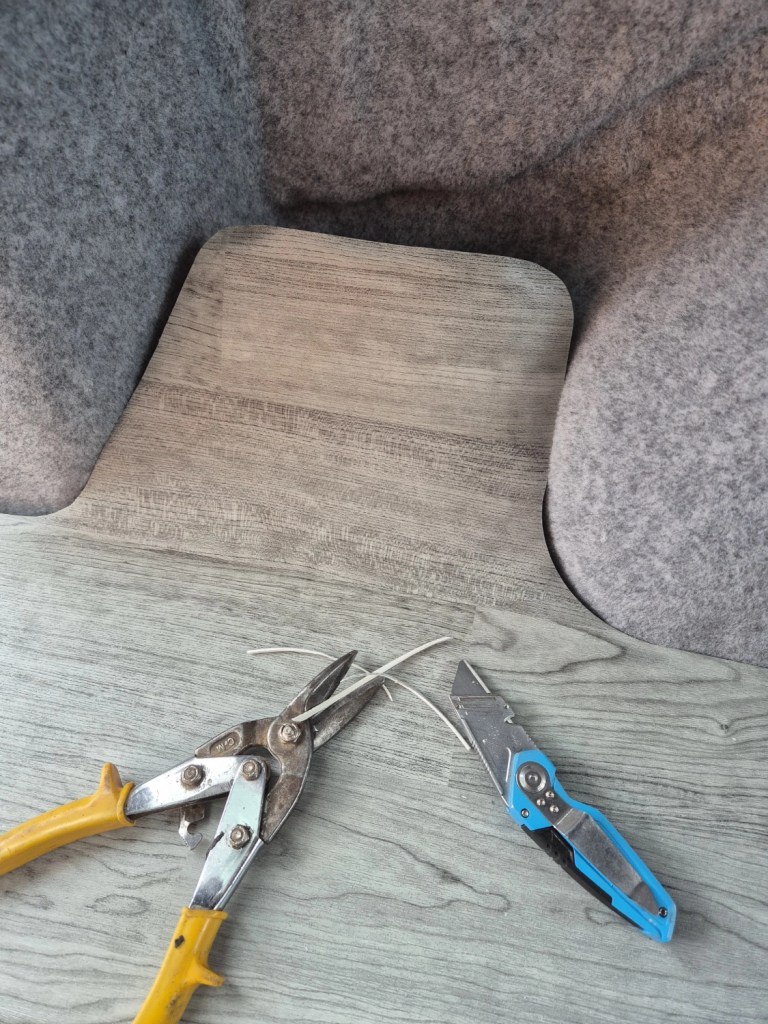
I worked my way from the top, by the tailgate, and around the van. I found tin snips to be the best tool to cut the bulk of the excess, and then a scalpel to gingerly remove the final bits 1mm at a time to ensure a perfect fit😅.
Once I was happy with the fit, I decided the best way to tackle the glueing was to pull up the passenger side, apply the glue, lay down the floor, then pull up the driver’s side and do the same. Working left to right (or right to left) made more sense due to the shapes at the side of the van – they’re more or less symmetrical so it made it easier to manipulate the heavy, cumbersome altro flooring. I’d read many people just use spray glue, but I decided to grab some vinyl flooring adhesive for an assured “stick” – in the end I opted for a 2.5l of this eco stick vinyl glue.

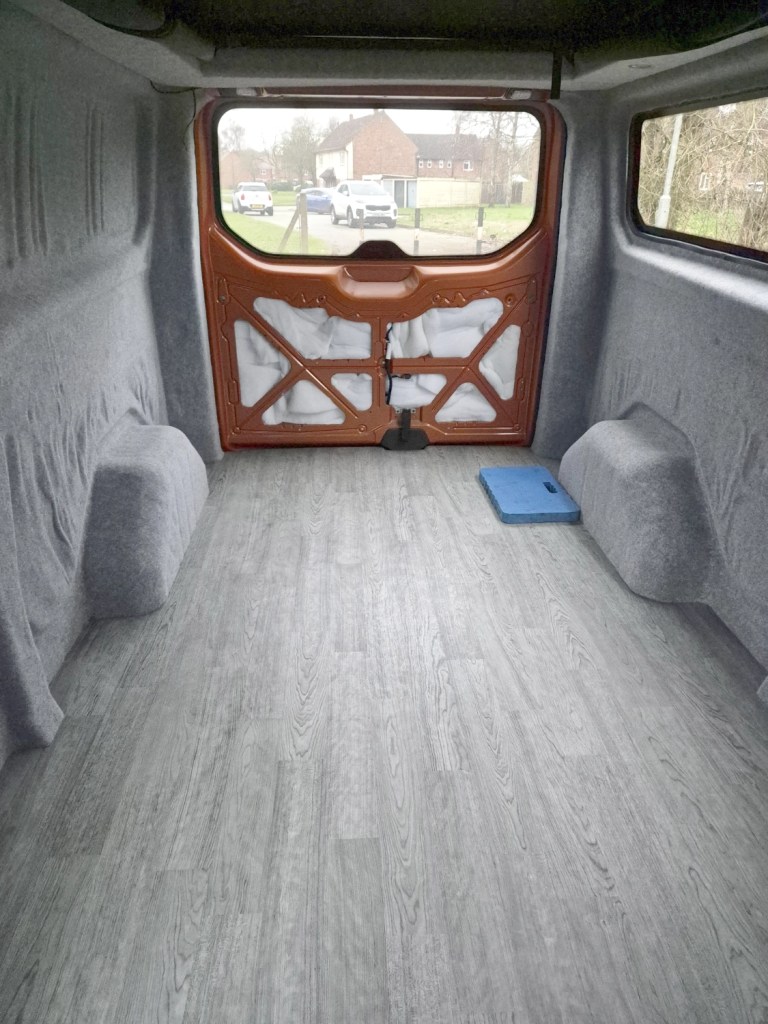
Et voila! Our beautiful new flooring is down!
We went for the pre-cut wood effect altro flooring from Combe Valley campers, in a “Slate Oak” finish, which kept things light and went nicely, in my opinion, with the silver carpeting.
The next job was meant to be carpeting the remaining ply panels, but something exciting came up and beat us to it… we’ll tell you about it next week!
Read our progress so far!
03. Part 01: Stripping the Interior
04. Part 02: Installing the Windows
05. Part 03: Installing the Pop Top (1)
06. Part 03: Installing the Pop Top (2)
07. Part 03: Installing the Pop Top (3)
10. Part 06: Floor Removal, Sound Deadening & Insulation
11. Part 07: Fitting the Carpet
Discover more from Treks, Trails & Travel
Subscribe to get the latest posts sent to your email.

Definitely taking shape now!! Like the grey floor too, keeps things light and open.
LikeLiked by 1 person
It really is starting to look like a camper and it’s very exciting! 😁 Thank you, I agree, I want to keep things light and airy to help alleviate feeling couped in together. Black interiors are super practical and Cosy, but I always feel they’re very claustrophobic.
LikeLike
Looking good😀
LikeLiked by 1 person
Thanks Jim! 😁
LikeLiked by 1 person
Have to say I’d be tempted to throw a mattress in that and be off!! BBQ to cook on and a Jetboil, and away!!!
LikeLiked by 1 person
Haha to be fair, we almost have done this! Unfortunately the last few weekends have been filled with birthdays and other commitments but it could happen very soon… 😜
LikeLiked by 1 person
Looking beautiful 😄
LikeLiked by 1 person
Ahh thank you ☺️☺️
LikeLiked by 1 person
🙏😊
LikeLike
And another milestone reached – onwards!
LikeLiked by 1 person
Indeed!! There were a handful of jobs we could do ourselves so progress moved quickly for a while. I’ve spent weeks now looking for kitchens but barely anyone replies to messages or answers the phone (honestly I shocked!) or they only have a few colours available which don’t match my seat and floor. Think I’ve found a solution now though – 6 week waiting time, so might be a while before I update on that front 😅
LikeLike
We tend to use the kitchen in the van more in winter. In summer I tend to cook outside on a normal camping stove – although of course the kitchen also has cupboards etc. There are just so many decisions to make with a campervan!
LikeLiked by 1 person
I’m sure we will cook outside too, but if I’m honest I’m more looking forward to just being able to make a brew after a walk 😜 Also I can’t wait to have somewhere to put all the bits and pieces like our bags and boots and helmets etc – we have nothing right now and I don’t want to leave things loose and likely to fly around with the boys in the back 😅… Ps also excited at the idea of eventually getting a fridge/freezer to store a cheeky ice cream or two 🤫
LikeLike
We have a fridge but I took out the freezer as it took up space and cold beer wins over ice cream every time! 😊. It runs off the leisure battery which is turn is charged by a solar panel. Or it runs off 240v when we’re hooked up
LikeLiked by 1 person
Was it two separate units or a two in one? I’ve been looking at a two in one thing, might have to sure that we can find one that fits beer AND ice creams, as the husband might have something to say if I’m just storing ice creams 😅. We’re hoping to make it a fully off grid set up and having a solar panel will really help with the fridge especially (so I’ve heard anyway 🙂)
LikeLike
Ours is a Vitrifigo fridge (I think). It has a very small freezer section probably only big enough for a bag of peas and a few fish fingers so I just asked the converter to remove it and we never missed it.
My advice would be to really think hard about the electrical system. If you are using off grid then it’s a vital component to make sure you can survive for at least a couple of nights or longer. They can also be troublesome so make sure you get a really good reliable supplier. We have a Lithium Battery which is expensive but holds a lot more charge and unlike a Lead Acid you can completely discharge it without damaging it. I’ve lasted a week no problem off grid running the fridge, lights, water pump, and charging devices. Happy to share my thoughts when you get to that point
LikeLiked by 1 person
Ahh yes I’ve heard about lithium but I think it’s well worth the price, I’d rather save and wait a little longer than rush in with a lead acid one. Are you fully electric? I’m leaning towards that with an induction hob too as you seem to have to be in a secret club to find gas bottles for sale, plus I don’t want to ever get caught out with one emptying 😂 also paranoid about explosions even though I know it’s super rare 🙈
LikeLike
We have a gas hob as I think you’d need an inverter to run an electric hob from the battery and I think it would drain it pretty quickly if you weren’t hooked up. There are various options now for gas cylinders that are much easier to buy and replace. We used to carry two when we had the trailer tent in case we ran out. We have refillable LPG in our van and it took us over 2 years to use up the first bottle. As I say in summer we cook outside and you can buy cheap stoves that off the aerosol style canisters which are freely available and cheap
LikeLiked by 1 person
Ahh probably not a wise decision the after all! 😅… My husbands just bought one of those gas hobs actually as we’re prone to power cuts where we live, but he said we could easily use it when we’re roaming. I’d still like a nice little hob inside for making that brew though on a cold day 😁
LikeLiked by 1 person